| Series 6400 Installation Guide |
||
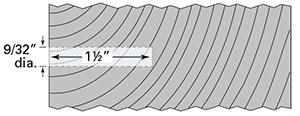
Hole size for 3/16" dia. Cable Installation: Drill 7/32" hole clear through intermediate posts. Drill 29/64" hole clear through Receiver tensioning Drill 9/32" hole 1-1/2" into the inside of the |
 |
|
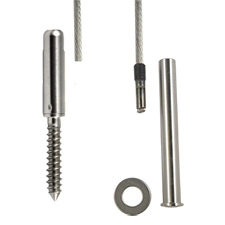
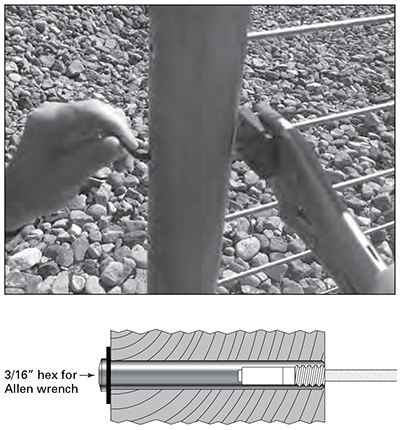
| 1. Install the tensioning end first with the Receiver 2. Slip the S/S flat washer over the body of the Receiver and insert the Receiver into the wood post. (Use Delrin Washer if used in metal post) 3. Start the threaded stud attached to the cable into the Receiver and turn 3 complete turns. This will thread about 1/2 of the stud into the Receiver. |
 |
|
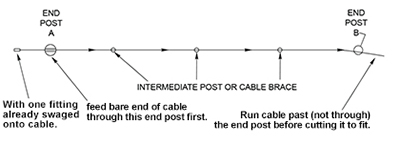
| 4. Run the bare end of the cable through all your posts and to the end post where you be installing the Push-Lock® fitting. |
 |
|
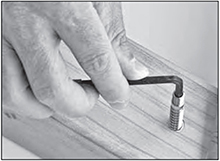
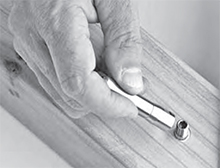
| 5. Use a hex wrench to install the lag section of the fitting into your pre-drilled pilot hole. |
 |
|
| 6. Thread the Push-Lock® coupler onto the post and tighten with 7/16” wrench. |
 |
|
| 7. Make sure the post side of the Push-Lock® lag is flush against the post. |
 |
|
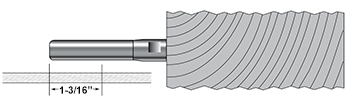
| 8. Pull the cable tightly along the side of the fitting and mark the cable 1-3/16” from the end of the fitting opposite the post. Mark and cut the cable on your mark. |
 |
|
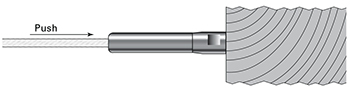
| 9. Push the cable into the hole in the
fitting as far as it will go (approximately 1-1/16”). Twist the cable in a right hand direction as you |
 |
|
10. Go to the other end and tension the cable by
|
 |
|
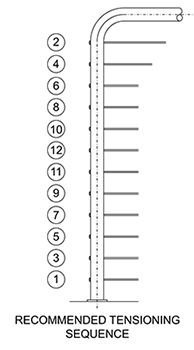
11. Tension in sequence, beginning with the outside cables and moving from side to side toward the center. |
 |
|