|
Our Products
Shopping cart
Our services


|
|
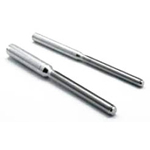
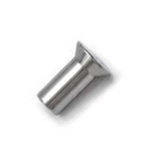
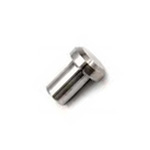
Traditional Threaded Studs
 |
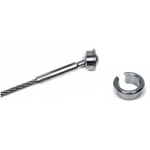
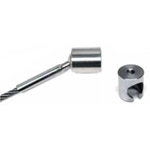
- Threaded Stud
- Right Hand Thread
- Left Hand Thread
- Installation Guide
- 1/4" Installation Guide
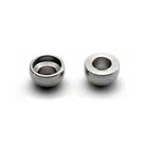
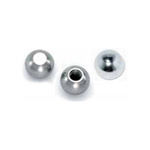
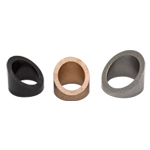
- End Fitting Options
|
|
|
How it works.
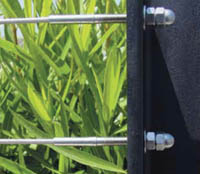
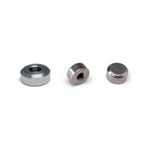
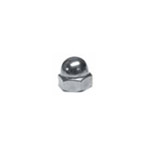
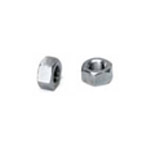
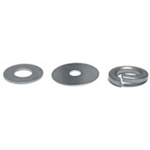
The most cost effective cable attachment and tensioning solution offers a very “clean” look. This system normally uses a flat washer and hex nut for tensioning against the end vertical posts in the run. A cap (acorn) nut is installed on the protruding threads to finish off the attachment and lock the tensioning nut in position.
Please select right or left hand thread from above tabs.
|

| Traditional Threaded Stud (Right Hand) |
SWAGE |
|
316SS |
| Cable Dia. |
Part No. |
"T"
THREAD SIZE |
"L"
OVERALL
LENGTH |
"B"
THREAD
LENGTH |
"D"
DIA. |
| 1/8" |
10T40803 |
1/4"-28 RH |
2.750" |
1.500" |
.247" |
| 1/8" |
10T40805 |
1/4"-28 RH |
3.500" |
2.250" |
.247" |
| 1/8" |
10T40807 |
1/4"-28 RH |
4.562" |
3.250" |
.247" |
| 5/32" |
10T50803 |
1/4"-28 RH |
3.150" |
1.500" |
.295" |
| 5/32" |
10T50805 |
1/4"-28 RH |
3.900" |
2.250" |
.295" |
| 5/32" |
10T50807 |
1/4"-28 RH |
4.900" |
3.250" |
.295" |
| 3/16" |
10T60803 |
1/4"-28 RH |
3.187" |
1.500" |
.357" |
| 3/16" |
10T60805 |
1/4"-28 RH |
3.970" |
2.250" |
.357" |
| 3/16" |
10T60807 |
1/4"-28 RH |
4.970" |
3.250" |
.357" |
| 3/16" |
10T61003 |
5/16"-24 RH |
3.265" |
1.500" |
.357" |
| 3/16" |
10T61005 |
5/16"-24 RH |
4.140" |
2.375" |
.357" |
| 1/4" |
10T81003 |
5/16"-24 RH |
3.780" |
1.500" |
.425" |
| 1/4" |
10T81005 |
5/16"-24 RH |
4.780" |
2.375" |
.425" |
| 1/4" |
10T81203 |
3/8"-24 RH |
3.775" |
1.500" |
.425" |
| 1/4" |
10T81205 |
3/8"-24 RH |
5.025" |
2.750" |
.425" |
| 1/4" |
10T81623 |
1/2"-13 RH |
4.000" |
2.000" |
425" |
| 5/16" |
10T101603 |
1/2"-20 RH |
5.930" |
3.000" |
.633" |
| 3/8" |
10T121603 |
1/2"-20 RH |
6.095" |
3.000" |
.700" |
| Please click part number to order. |
| Larger sizes also available. Please call for details. |
|
| Traditional Threaded Stud (Left Hand) |
SWAGE |
|
316SS |
| Cable Dia. |
Part No. |
"T"
THREAD SIZE |
"L"
OVERALL
LENGTH |
"B"
THREAD
LENGTH |
"D"
DIA. |
| 1/8" |
10T40802 |
1/4"-28 LH |
2.750" |
1.500" |
.247" |
| 1/8" |
10T40804 |
1/4"-28 LH |
3.500" |
2.250" |
.247" |
| 1/8" |
10T40806 |
1/4"-28 LH |
4.562" |
3.250" |
.247" |
| 5/32" |
10T50802 |
1/4"-28 LH |
3.150" |
1.500" |
.295" |
| 5/32" |
10T50804 |
1/4"-28 LH |
3.900" |
2.250" |
.295" |
| 5/32" |
10T50806 |
1/4"-28 LH |
4.900" |
3.250" |
.295" |
| 3/16" |
10T60802 |
1/4"-28 LH |
3.187" |
1.500" |
.357" |
| 3/16" |
10T60804 |
1/4"-28 LH |
3.970" |
2.250" |
.357" |
| 3/16" |
10T60806 |
1/4"-28 LH |
4.970" |
3.250" |
.357" |
| 3/16" |
10T61002 |
5/16"-24 LH |
3.265" |
1.500" |
.357" |
| 3/16" |
10T61004 |
5/16"-24 LH |
4.140" |
2.375" |
.357" |
| 1/4" |
10T81002 |
5/16"-24 LH |
3.780" |
1.500" |
.425" |
| 1/4" |
10T81004 |
5/16"-24 LH |
4.780" |
2.375" |
.425" |
| 1/4" |
10T81202 |
3/8"-24 LH |
3.775" |
1.500" |
.425" |
| 1/4" |
10T81204 |
3/8"-24 LH |
5.025" |
2.750" |
.425" |
| 5/16" |
10T101602 |
1/2"-20 LH |
5.930" |
3.000" |
.633" |
| 3/8" |
10T121602 |
1/2"-20 LH |
6.095" |
3.000" |
.700" |
| Please click part number to order. |
| Larger sizes also available. Please call for details. |
|
|
|
|
 Printable Format (.pdf) Printable Format (.pdf) |
 |
| |
Threaded Stud System Installation Guide
Cable Art Inc. accepts no liability for improper use or assembly of these products. |
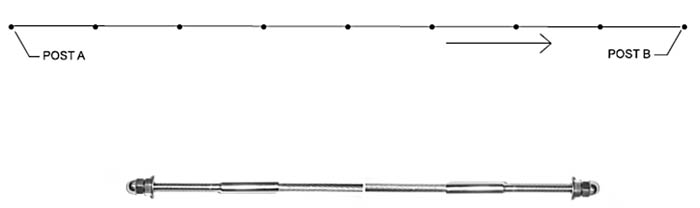
| If you have chosen the Threaded Stud System for your project the instructions below should help you with the install process. |
|
Step 1 -

|
Make sure you have all the proper equipment and parts required
Tools required are 2 = 7/16” open ended wrench, Cable Gripper (50TCG1), and cut off wheel or grinder (or hacksaw). |
| Step 2 - |
Attach one side of the cable assembly into the beginning post (A). Connect one Flat Washer (11HW8) (11HFW8 For Wood), Hex Nut (11HN8R), and Cap Nut (11HCN8R) on to the fitting. Lock the nuts together using the 7/16 wrenches. |
| Step 3 - |
Run cable through the intermediate posts to the other End Post (B). |
| Step 4 - |
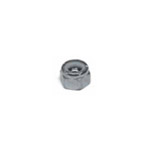
Pass the threaded stud through the end post (B). Attach washer and hex nut to the threaded stud. Tension the cable by tightening the hex nut. (NOTE: Use the Cable Gripper (50TCG1) to hold the cable from rotating while tensioning the hex nut.) Cables need to be tensioned to about 150 to 200 pounds each. After tensioning, attach the cap nut to the stud and lock the cap nut to the hex nut without loosening the hex nut from the stud. If the cap nut does not touch the hex nut when attaching to stud, remove the cap nut and attach an additional hex nut and lock together. Cut excess thread off of stud with a cut off wheel or hacksaw. Remove additional hex nut and replace with the cap nut and lock together with the wrenches. Continue this process until all the cables are tensioned properly. |
|
|
|
 |
|
|
|
|
| Printable Format (.pdf) |
|
|
|
|
|
|
|
|
|
Printable Format (.pdf) |
|
| |
1/4" Threaded Stud System Installation Guide
Cable Art Inc. accepts no liability for improper use or assembly of these products. |
| If you have chosen the Threaded Stud System for your project the instructions below should help you with the install process. |
|
Step 1 -
|
Make sure you have all the proper equipment and parts required
Tools required are 2 = 1/2” and 1 = 9/16” open ended wrench, Cable Gripper (Vise Grip with a Rubber Hose to protect the cable), and cut off wheel or grinder (or hacksaw). |
| Step 2 - |
Attach one side of the cable assembly into the beginning post (A). Connect one Flat Washer (11HW10) (11HFW10 For Wood), Hex Nut (11HN10R), and Cap Nut (11HCN10R) on to the fitting. Lock the nuts together using a 1/2” and 9/16” wrenches. |
| Step 3 - |
Run cable through the intermediate posts to the other End Post (B). |
| Step 4 - |
Pass the threaded stud through the end post (B). Attach washer and hex nut to the threaded stud. Tension the cable by tightening the hex nut. (NOTE: Use the Cable Gripper to hold the cable from rotating while tensioning the hex nut.) Cables need to be tensioned to about 150 to 200 pounds each. After tensioning, attach the cap nut to the stud and lock the cap nut to the hex nut without loosening the hex nut from the stud. If the cap nut does not touch the hex nut when attaching to stud, remove the cap nut and attach an additional hex nut and lock together. Cut excess thread off of stud with a cut off wheel or hacksaw. Remove additional hex nut and replace with the cap nut and lock together with the wrenches. Continue this process until all the cables are tensioned properly. |
|
|
|
|
|
|
|
|
| Printable Format (.pdf) |
|
|
|
|
|
|
|
|
|