 |
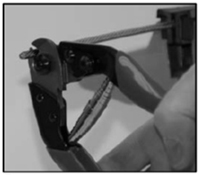
- Stud Tensioners
- How It Works
- Assembly Instructions
- Installation Instructions

|
||||||||||||||||||||||||||||||||||||
 |
| How It Works Handy Grip fittings are offered for use with 1x19 or 7x7 cable strand configurations. All hardware is made from the high quality 316 grade stainless steel for superior corrosion resistance. This simple cable tensioning system provides for an extremely "clean" look concealing the threads for adjustment internally. The Typical application is for short to medium length cable runs. Cable tensioning is easily accomplished with the use of a 3/16" hex key wrench (Allen Wrench). See below for angle compensation options. Additionally, the stud tensioners can be used in conjunction with other stud length combinations and systems to meet your design criteria. |
| Handy Grip Swageless Cable Hardware Assembly Instructions Please follow the instructions below exactly as described. Cable Art Inc. accepts no liability for improper use or assembly of these products. Designed for use with stainless steel cable in strand configurations of 1x19 or 7x7. Sizes include 1/8"or 3/16" diameter. |
|||
| If you have chosen the Handy Grip System for your project the instructions below should help you with the install process. Please be sure to read complete instructions before proceeding. Improper installation can result in injury! If you have any questions please call before proceeding. (If one end of cable is machine swaged, read step #1 then go to step #4) |
|||
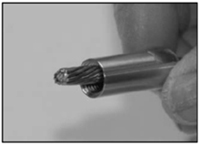
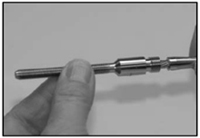
| Step 1 - | Cut cable to length. Note: Once cut, the cable should not exhibit any burrs or strand deformation. See figure 1. | ||
| Step 2 - | Install the "Body Section" of the fitting with the largest / threaded opening facing out. See figure 2. | ||
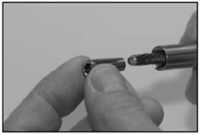
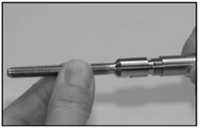
| Step 3 - | Install the "Cone Section" onto the wire with the smallest diameter first. See figure 3. Note: If the cone does not slide on "freeley" due to some deformation of the wire, twist the cone, in the same direction as the lay of the wire, while applying light to moderate inward pressure. Once the cone clears the cable end, it should slide with little effort. See figure 4. | ||
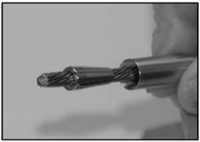
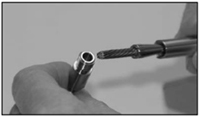
| Step 4 - | Using the hole in the "End Fitting" as a depth guide, (See figure 5) place the end fitting over the cable end until it bottoms out. See figure 6. | ||
| Step 5 - | While holding the "End Fitting" bottomed against the wire, slide the cone to the face to mate with the end fitting face. See figure 7. | ||
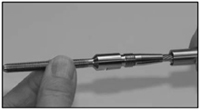
| Step 6 - | Slide the body section to the "End Fitting" and engage the threads. See figure 8. | ||
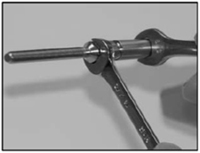
| Step 7 - | Tighten the threads to a minimum torque of 23 Foot/lbs. to ensure proper grip on wire. See figure 9. | ||
 |
 |
 |
|
| Figure 1 | Figure 2 | Figure 3 | |
 |
 |
 |
|
| Figure 4 | Figure 5 | Figure 6 | |
 |
 |
 |
|
| Figure 7 | Figure 8 | Figure 9 | |
| Handy Grip Installation Guide |
|||
| If you have chosen the Handy Grip System for your project the instructions below should help you with the install process. Please be sure to read complete instructions before proceeding. Improper installation can result in injury! If you have any questions please call before proceeding. (If one end of cable is machine swaged, read step #1 then go to step #4) | |||
| Step 1 - | Tools required: Cable Cutter, (2) open end wrenches, optional Cut-Off Wheel. | ||
| Step 2 - | Attach fitting per assembly instructions. | ||
| Step 3 - | Connect at first location and run cable to the other end. If turnbuckles are used, set to 2/3 open position. | ||
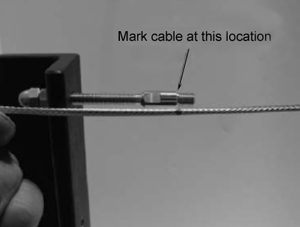
| Step 4 - | Connect loose handy Grip fitting to second location and pull cable tightly along side to measure for cut as shown below. Mark and cut cable. | ||
 |
|||
| Step 5 - | Attach fitting per assembly instructions. | ||
| Step 6 - | If Threaded Studs are used, attach washer and hex nut to both sides of the cable assembly. Cables need to be tensioned to about 150 to 200 pounds each. After tensioning, attach additional hex nut and lock together. Cut excess thread off of stud with a cut off wheel. Remove additional hex nut and replace with a cap nut (acorn). | ||
| Step 6A - | If Turnbuckles are used, connect the assembly and tension cable. Cables need to be tensioned to about 150 to 200 pounds each. | ||